Kibana中应用Timelion, X-pack, ML监测异常

Timelion

在表达式栏里,可以创建一个Timelion表达式以指向一个或多个数据源,而不仅限于Elasticsearch。Kibana仪表板唯一可能的数据源就是Elasticsearch,这是两者之间的一个主要区别。
点击Kibana面板上的Timelion即可进入编辑页面。

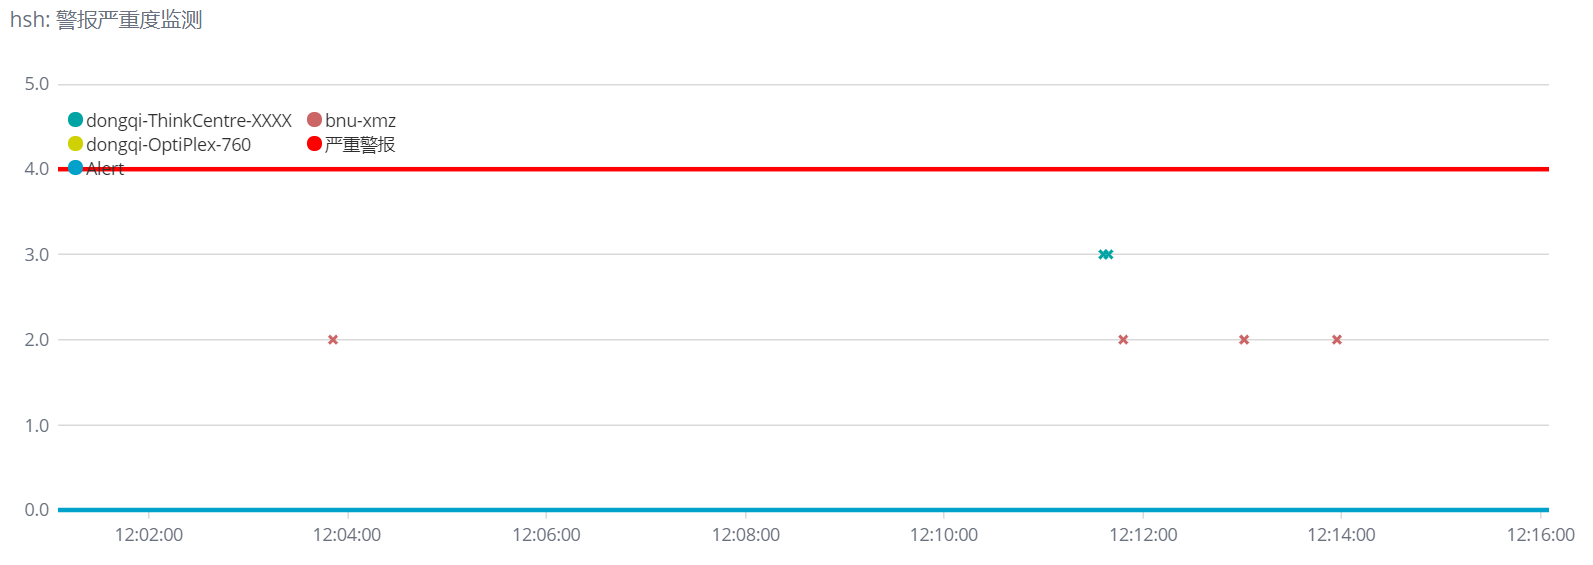
警报严重度监测

1
2
3
.es(index=filebeat-*, timefield='@timestamp', metric = 'max:suricata.eve.alert.severity', split=beat.name:5).label(regex='.* beat.name:(.*) > .*', label='$1').points(symbol=cross).legend(columns=2, position=nw),
.static(4, label='严重警报').color(#ff0000),
.es(index=alert-hsh*).label('Alert')

说明:

  • 如果一些数据出现缺失,可以利用fit函数,以特定的模式(carry, scale等)对数据进行插值。
  • 在图表中打印输出两个阈值,一条静态的直线表示警戒值,另一条线代表若被超过则问题严重。
  • 其中用到了正则表达式,是为了让图例中的文字更加精简。
  • 这里用到了自定义的索引alert-hsh*,这是与x-pack结合使用,如果x-pack发出警报,则在Timelion中Alert的值就为1,否则为0。 效果图:
    Timelion0

警报数目异常

1
2
3
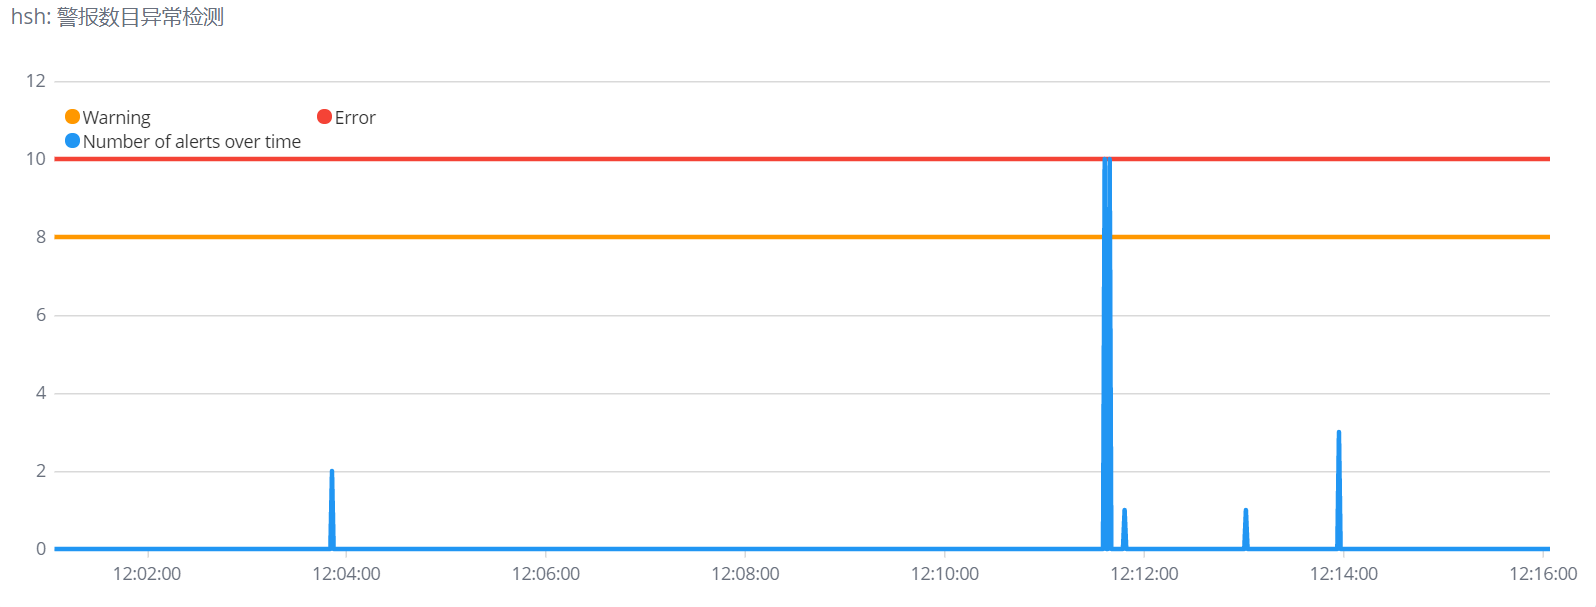
.static(8).color(#FF9800).label(Warning),
.static(10).color(#F44336).label(Error),
.es(index=filebeat-*,q='suricata.eve.event_type:alert').color(#2196F3).label('Number of alerts over time').legend(columns=2, position=nw)</code>

效果图:
Timelion1

参考资料

https://segmentfault.com/a/1190000016679290

X-pack

验证X-pack是否安装成功(usernamepassword是自己的用户名和密码):
curl -u username:password -XGET 'http://172.16.176.51:9200/_watcher/stats?pretty'
在Kibana面板依次点击Management->Watcher->Create advanced watch即可进入编辑页面。
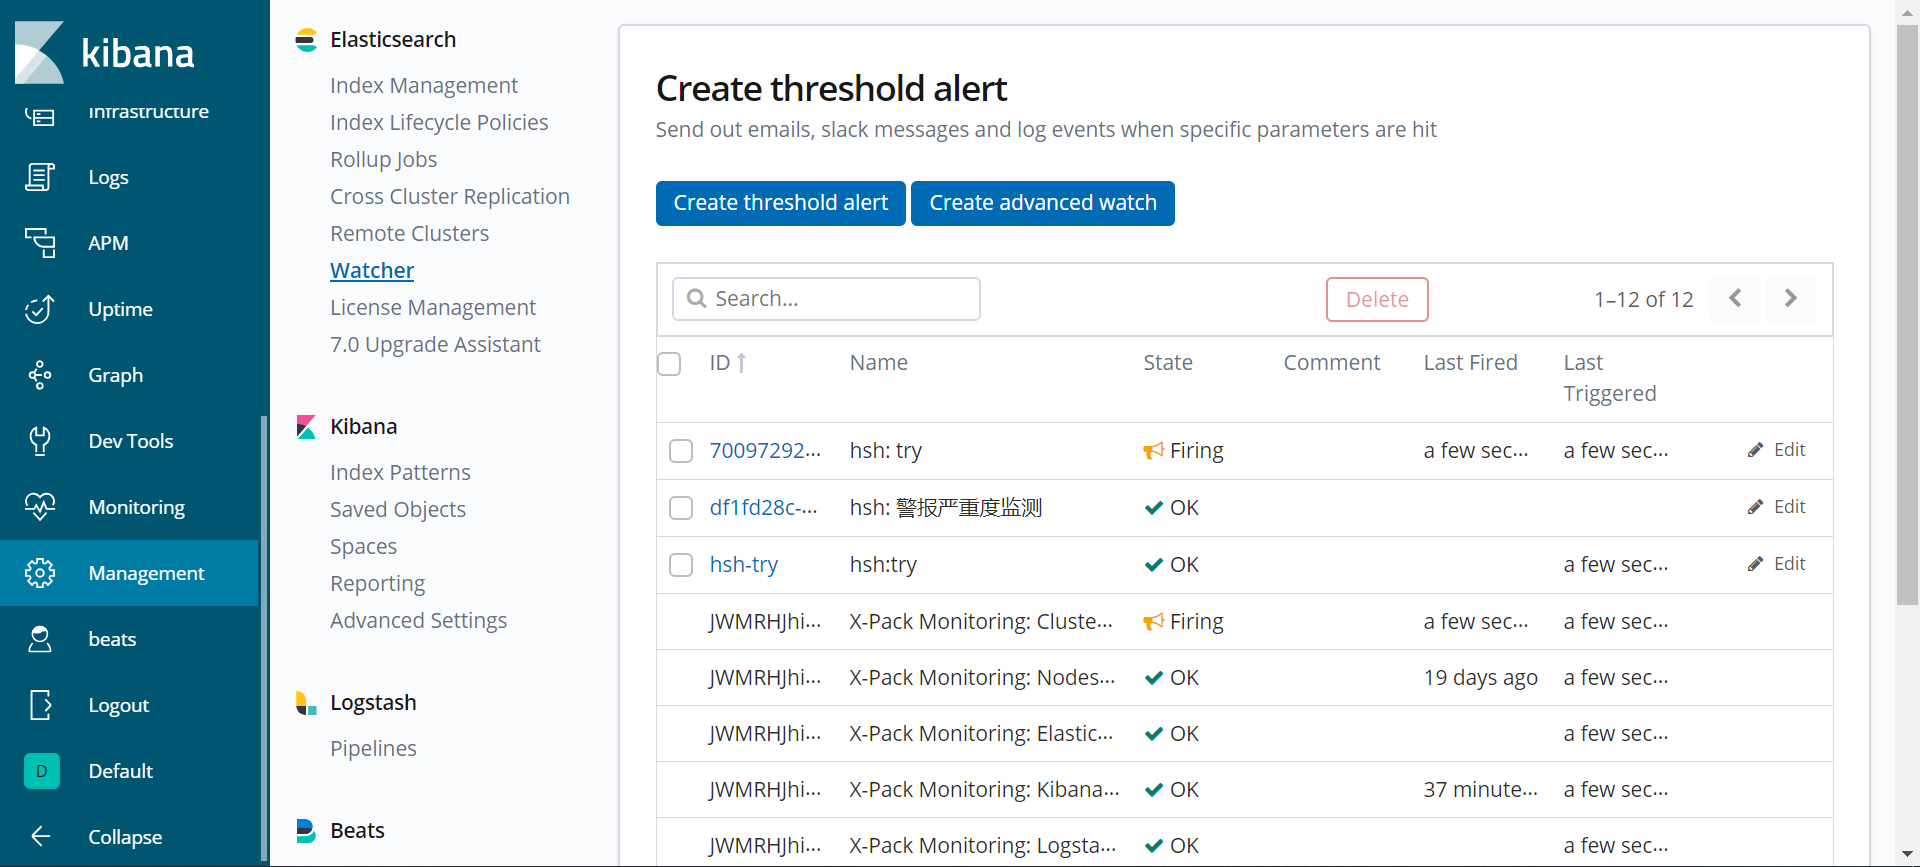
CreateAWatch
下面是一个监测suricata.eve.alert.severity是否>3的watcher,当>3时,会创建一个名为alert-hsh*的索引。

Watcher

1
2
3
4
5
6
7
8
9
10
11
12
13
14
15
16
17
18
19
20
21
22
23
24
25
26
27
28
29
30
31
32
33
34
35
36
37
38
39
40
41
42
43
44
45
46
47
48
49
50
51
52
53
54
55
56
57
58
59
60
61
62
63
64
65
66
67
68
69
70
71
72
73
74
75
76
77
78
79
80
81
82
83
84
85
86
{
"trigger": {
"schedule": {
"interval": "30s"
}
},
"input": {
"search": {
"request": {
"search_type": "query_then_fetch",
"indices": [
"filebeat*"
],
"types": [],
"body": {
"aggs": {
"host": {
"terms": {
"size": 10,
"field": "beat.name",
"order": {
"alert_severity": "desc"
}
},
"aggs": {
"alert_severity": {
"max": {
"field": "suricata.eve.alert.severity"
}
},
"alert_signature": {
"terms": {
"field": "suricata.eve.alert.signature"
}
}
}
}
},
"query": {
"bool": {
"filter": [
{
"range": {
"@timestamp": {
"gte": "now-{{ctx.metadata.window_period}}"
}
}
}
]
}
}
}
}
}
},
"condition": {
"script": {
"source": "if (ctx.payload.aggregations.host.buckets.size()==0) return false; def node=ctx.payload.aggregations.host.buckets[0]; return node.alert_severity.value>ctx.metadata.threshold;",
"lang": "painless"
}
},
"actions": {
"my-logging-action": {
"logging": {
"level": "info",
"text": "There are {{ctx.payload.hits.total}} documents in your index. Threshold is {{ctx.metadata.threshold}}. Test"
}
},
"index_payload": {
"transform": {
"script": {
"source": "def events=[]; def temp=ctx.payload.aggregations; for (int i=0;i<temp.host.buckets.length;i++) if (temp.host.buckets[i].alert_severity!=null){ def event=['@timestamp':ctx.trigger.triggered_time,'beat.name':temp.host.buckets[i].key,'alert.severity':temp.host.buckets[i].alert_severity.value]; events.add(event);} return ['_doc':events];",
"lang": "painless"
}
},
"index": {
"index": "alert-hsh",
"doc_type": "alert"
}
}
},
"metadata": {
"window_period": "30m",
"threshold": 3
}
}

参考资料

  1. https://yq.aliyun.com/articles/278046
  2. https://www.elastic.co/guide/en/elastic-stack-overview/7.2/how-watcher-works.html#watch-definition
  3. https://www.elastic.co/guide/en/x-pack/current/xpack-alerting.html
  4. https://blog.csdn.net/u012881331/article/details/88899420
  5. https://blog.csdn.net/dwyane__wade/article/details/80191106
  6. https://github.com/elastic/examples/blob/master/Alerting/Sample%20Watches/cpu_iowait_hosts/watch.json

ML, Raw Data与Graph配合使用

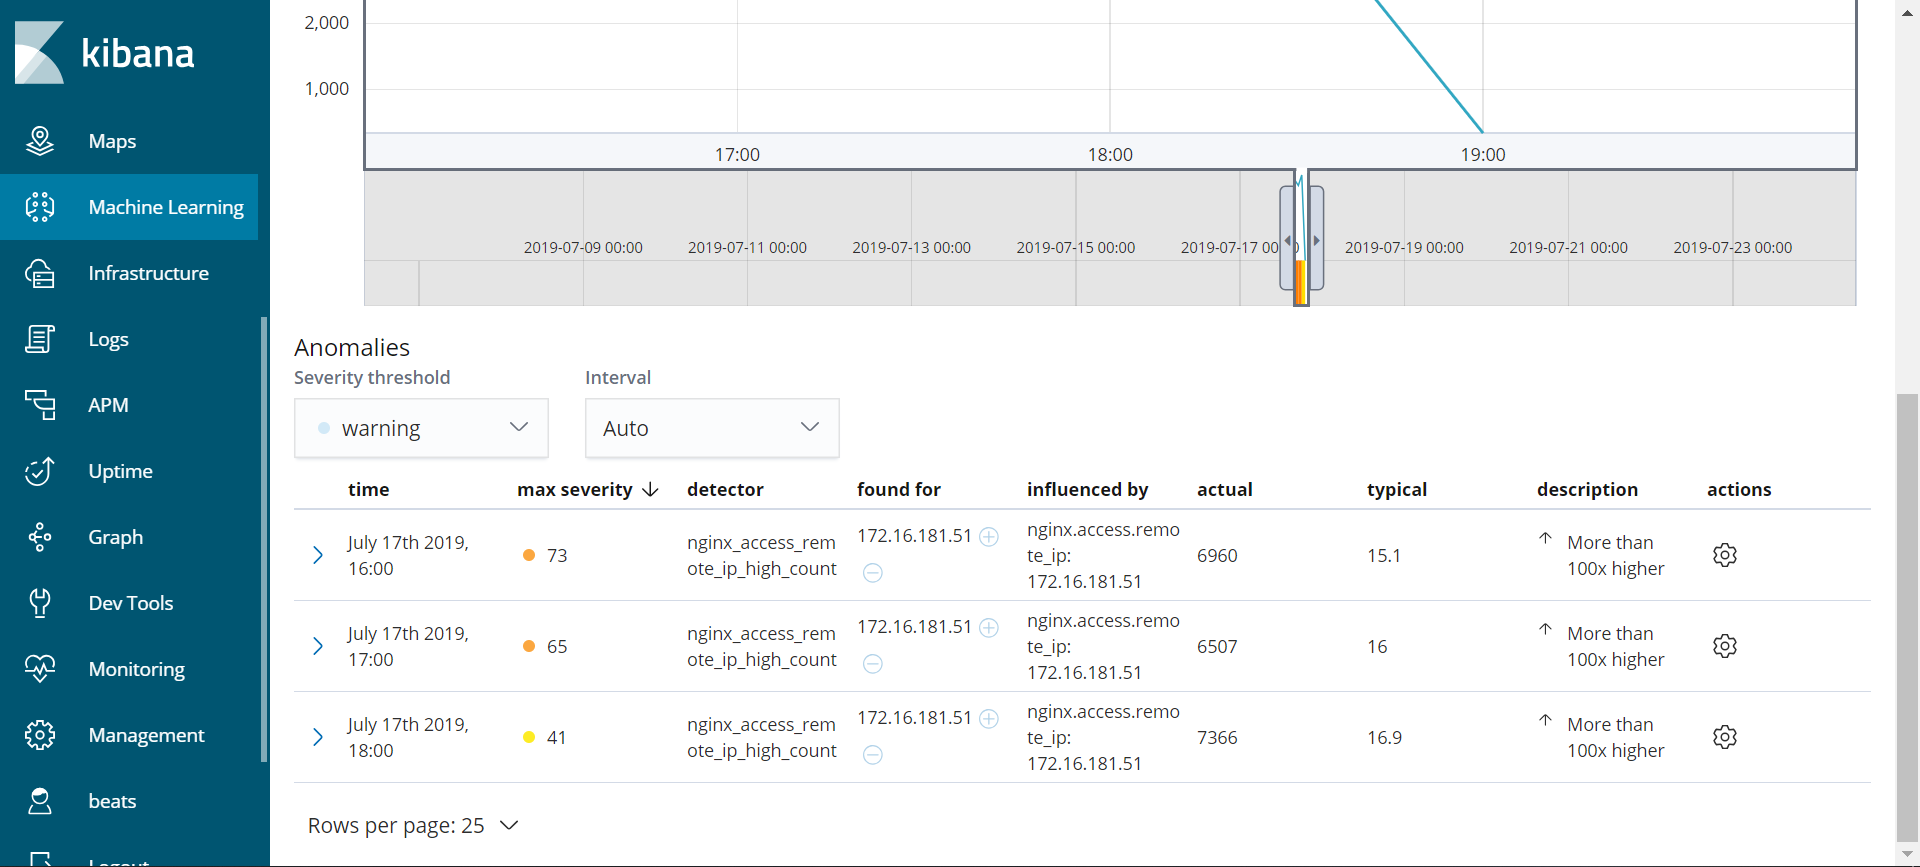
首先,在ML中创建Job,如果有Nginx服务,则会出现几个默认的Nginx有关的Jobs,启动就好。在下图中,可以看到有一个值的分数很高(代表这个值的异常度很高),说明这个IP地址在很短的时间内大量访问了net.bnu.edu.cnml0
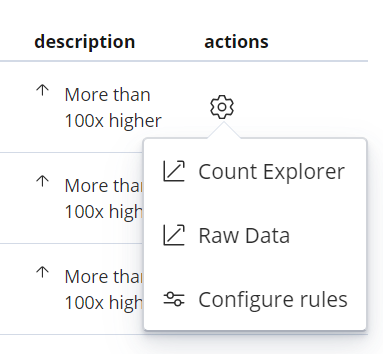
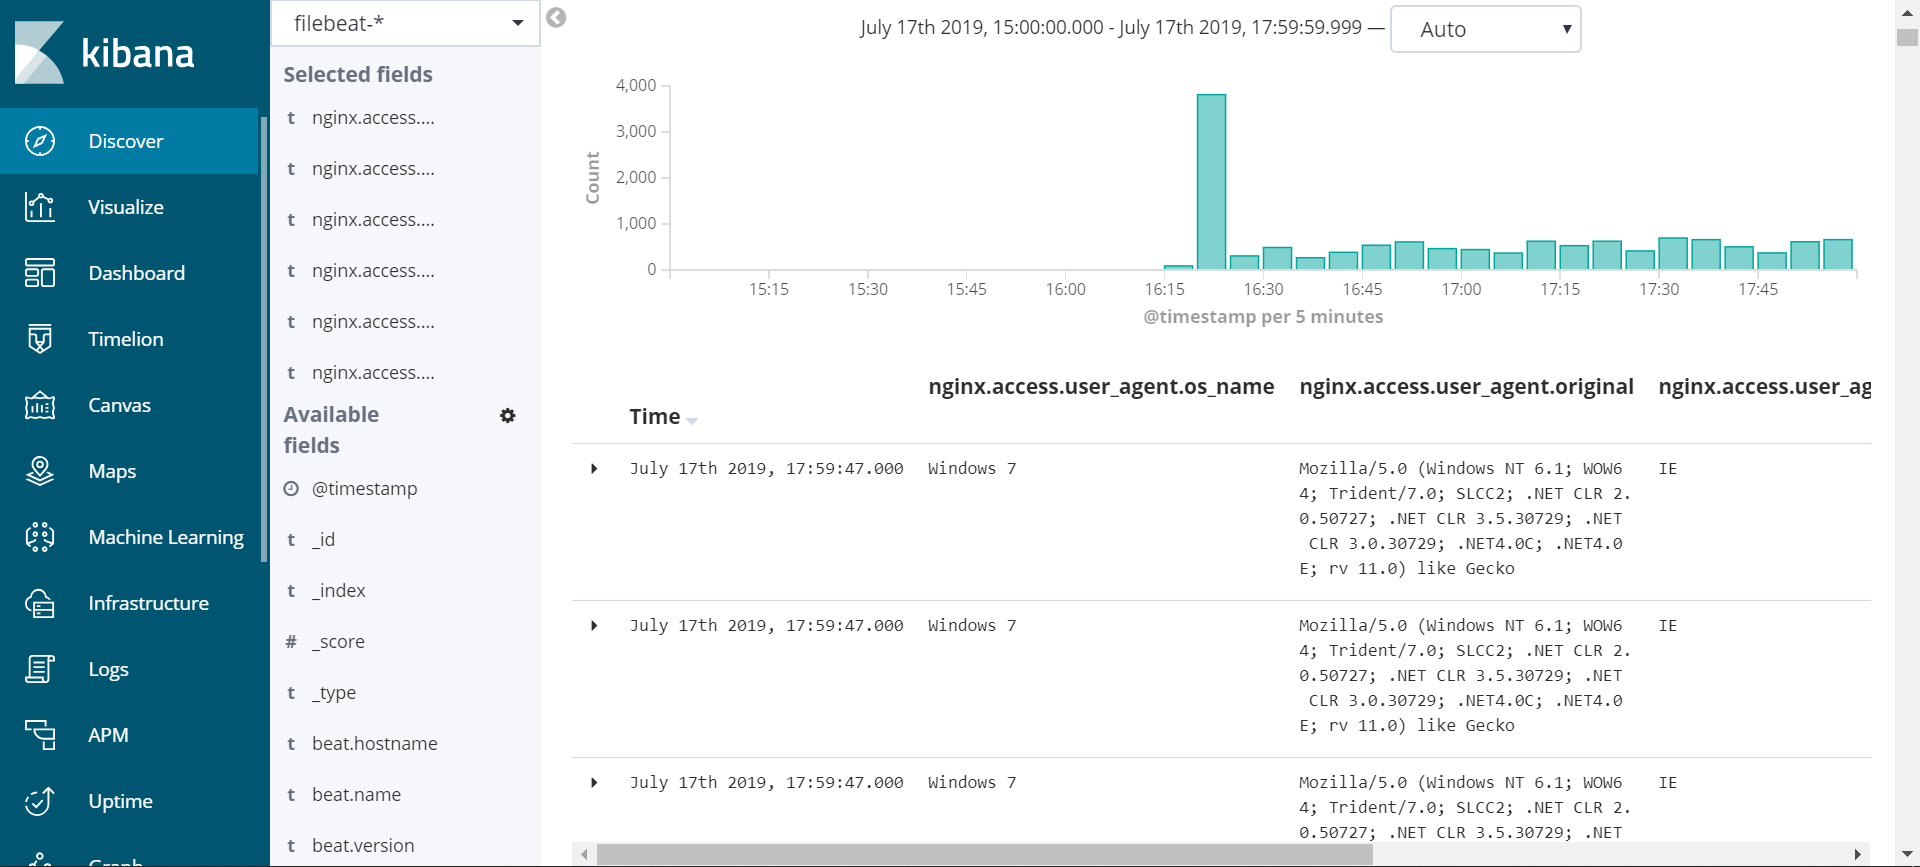
点击表格右边的类似螺丝钉的按钮ml1,再点击Raw Data,可以看到原始的数据,如下图所示。
ml2
此时,可以自行增加一些字段,使得数据的内容更加丰富,如下图所示。
ml3
此时,为了更进一步探究这些字段之间的关系,可以借助Graph工具。
在Graph工具中,需要选择index和想要探究的字段。这里,可以根据Raw Data中的字段来选择字段,如下图所示。
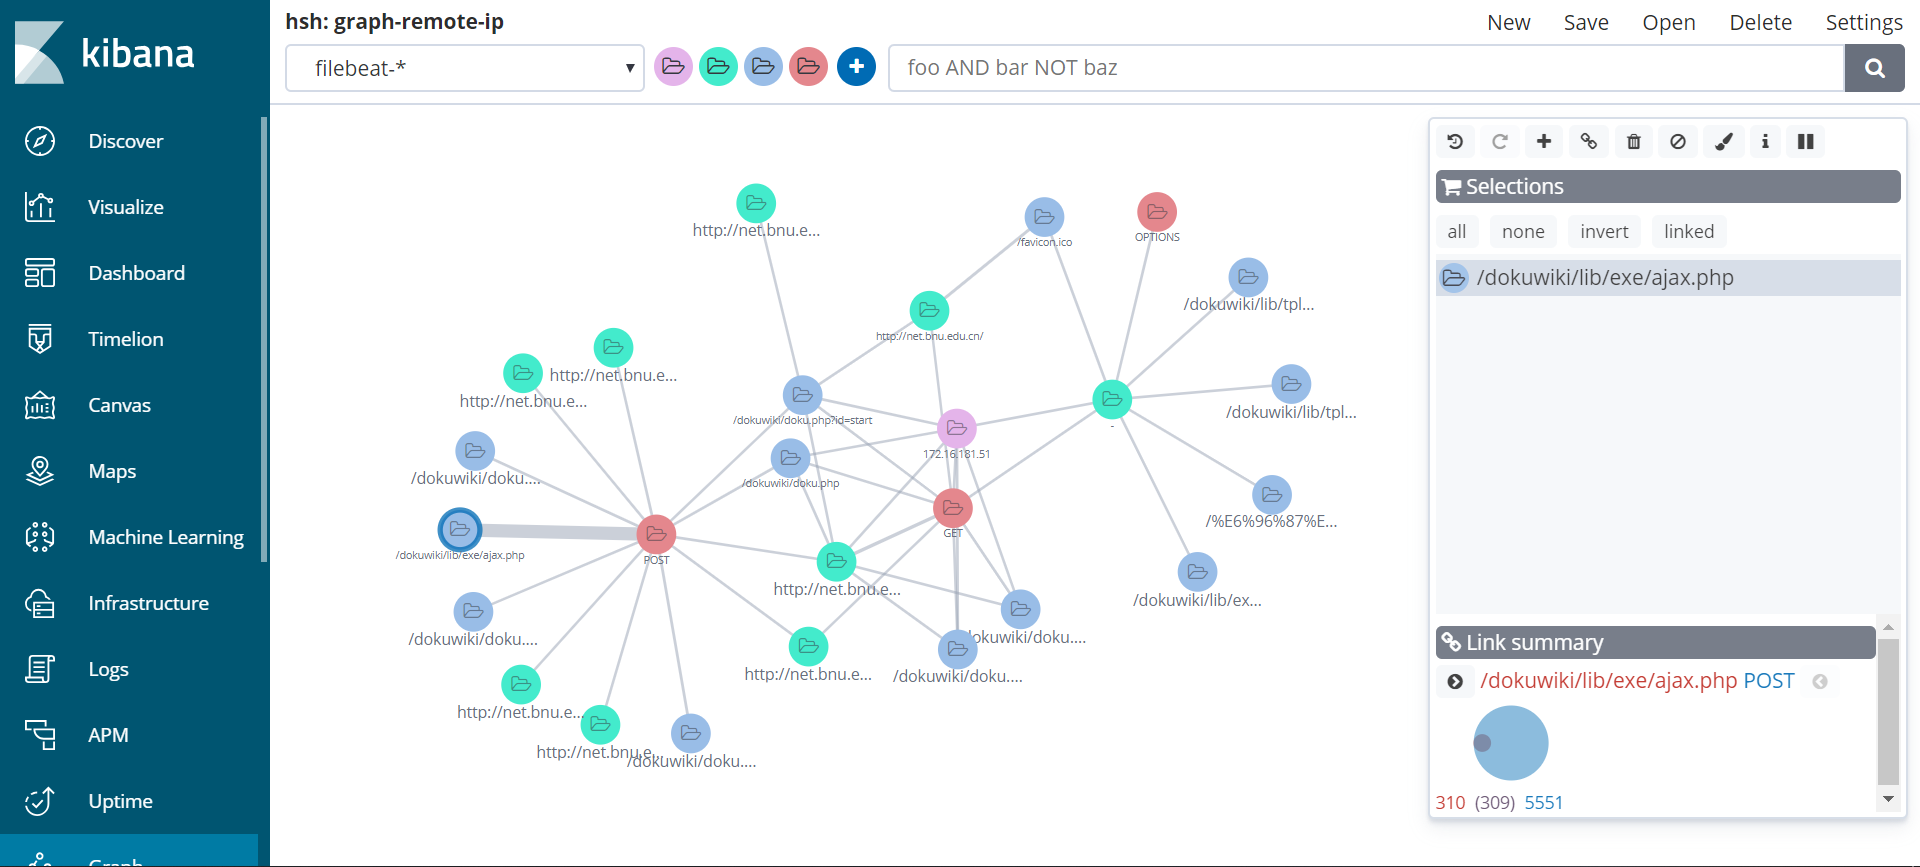
ml4
可以看到,/dokuwiki/lib/exe/ajax.phpPOST之间的关系比较强烈,因为这两个节点之间的连线非常粗。点击连线,在右下角可以看到具体的数值,310代表包含/dokuwiki/doku.php?id=xmz:brlek&do=edit字段的文档数,5551代表包含POST的文档数,309代表同时包含两个字段的文档数。说明这个IP地址通过POST方法,对这个url进行了多次请求。